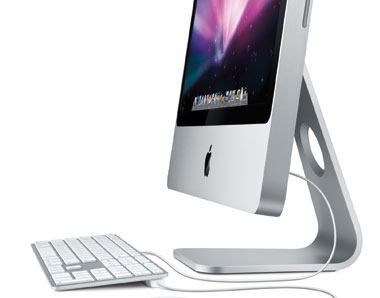
Yesterday, I upgraded from a Mac mini to a shiny new iMac. It’s a big step, not just because my new machine can run all those things my mini never could, and everything else it could run is running ten times faster, because it means I now have to rebuild my system from the ground up. Sure, I could simply create a disk image of my old machine’s hard drive and restore it to my new machine, or migrate everything over with Migration Assistant (well, if I owned a FireWire cable, anyway), but I don’t like lugging the mess along with me. I think a fresh start is an opportunity to rebuild a snappier, more reliable, and more productive system, so a system full of old junk is not the best way to start! I’m not going to talk about how to remove your new Mac from the box and plug the power in. That’s all covered in the manual. But once you’ve turned it on for the first time, what do you do?
- Run Software Update I can almost guarantee that your new Mac will not run the latest revision of Leopard. Mine came with 10.5.2 and we’re up to 10.5.4, so for maximum security and reliability it’s a good idea to run Software Update before you do anything else. You’ll likely find a bunch of other software updates waiting for you for other apps. Once you’ve completed the first update, run it again – sometimes you’ll find more that couldn’t be installed without first installing the first batch of updates.
- Get basic data transferred I use a folder structure that makes it easy for me to transfer 95% of my data from one computer to another without any more effort than dragging and dropping a folder onto an external hard drive, and then dragging it from the hard drive to the new system. This is just one of many reasons that using a clear and organized file and folder system is so important from the outset. The rest of the data is the stuff that gets hidden away in Library folders. This means mail, contacts, calendar, and things like that. For some applications you can export this data to a file and then re-import it, but I just use MobileMe to sync it. I haven’t had any problems with MobileMe so far, but since so many people are you might prefer a local sync like Mark/Space’s SyncTogether which can handle a wide variety of data types, but has a fairly hefty price tag at US$50. The one thing I’ve had to dig out manually in the past is mail boxes. Since the last time I did this I’ve changed much about the way I use email, though, and I mainly use the Gmail web interface and use Mail.app as a local back-up. So instead of transferring files I can just rely on my system sync to set up my IMAP accounts on the new machine
- Set up security features I recommend that one of the first things you take care of, especially with all your data now on the machine, is security. Head into the Security pane under System Preferences and turn off automatic log-in, and require a password to wake from sleep or a screen saver. I find that since most Macs aren’t turned off very frequently, it’s almost pointless to turn off automatic log-in without also requiring a password to wake from sleep. You may want to turn on FileVault to encrypt everything in your home directory, but you better make sure you remember the passwords you use or you won’t be getting your data back anytime soon! Under the Sharing preference pane, turn on your firewall and set it up to suit the way you work. If you’re paranoid like me you’ll want to also head into Safari’s preferences and turn off the Open “safe” files after downloading. This may never be a security problem but as I said, I’m paranoid and I like to be the one opening files; it’s one less thing the computer can do without asking me (and without going ridiculously overboard with the questions like Vista).
- Install your applications You’re now ready to go through the long and tedious task of installing all of your applications. This might seem fairly straightforward, but I’ve noticed that many people try to rush through this step. It’s important to take your time and go one by one if you want a machine that’s configured perfectly for your needs. If you’re not a Safari fan, the first thing you’d want to grab is your browser of choice – Firefox and Flock for me, but I started with Firefox this time. I suggest this because much of the software you’ll be installing is probably not on CDs, but on the Internet, and you’ll need something you’re comfortable using to suck it all down the pipes. But once you’ve downloaded Firefox, don’t head straight for the downloads. Follow the same process with each one. Download (or insert the disc, or open the disk image) and install each app. Try not to let them install anywhere but the Applications folder (some of the older installers insist on using the root of your hard drive). Now, stop! Don’t move on to the next app straight away. Open the one you just installed and configure it. Go into the preferences and set everything up the way you like it, and make any interface changes you prefer. The temptation is to configure applications as you go. But if you take your time to configure everything from the start, you’ll enjoy your system much more in the long run and you’ll actually save time, essentially thanks to the principles of batch processing.
- Inspect each System Preferences pane thoroughly We’ve used some of the System Preferences panes throughout this process so far, but there are many more that we haven’t. Just as with your applications, the temptation to set things up as you go is strong but you should just do it. One of the first things I do with any new Mac is set up screen corners (under Dashboard & Expose). Make sure you’ve inspected each and every one of the System Preferences panes because there will be settings you’ll want to change in the majority of them. Getting all done in one session is usually the only way some of those settings will end up getting configured!
- Use your new computer! At this point, your new computer should be set up and ready to use – enjoy it! Over time you’ll likely make little tweaks and improve your system, but you’ve done everything you need to do to hit the ground running.